Membuat Project
Untuk membuat proyek Spring Boot MVC, cara termudah adalah menggunakan Spring Initializr https://start.spring.io/ secara online atau melalui IDE (seperti IntelliJ/Eclipse) untuk menghasilkan struktur dasar dengan dependensi Spring Web.
💻 Prasyarat
Tutorial ini menggunakan teknologi:
- JDK 21 atau yang lebih baru.
- Maven 3.
- Database MySQL 8.
- Spring Boot 4.
1️⃣ Inisialisasi Proyek (Melalui Spring Initializr)
- Kunjungi https://start.spring.io/.
- Pilih:
- Project: Maven.
- Language: Java.
- Spring Boot: Versi terbaru.
- Dependencies:
Spring Web: Untuk fitur MVC dan server Tomcat tertanam/embedded.Spring Security: Untuk mengamankan semua endpoint secara otomatis.Thymeleaf: Sebagai template engine untuk tampilan View.Spring Boot DevTools(oprional): Mempercepat pengembangan dengan fitur live.
- Klik: Tombol Generate untuk mengunduh file ZIP proyek.
- Contoh isi
pom.xmljika menggunakan Maven:
<?xml version="1.0" encoding="UTF-8"?>
<project xmlns="http://maven.apache.org/POM/4.0.0" xmlns:xsi="http://www.w3.org/2001/XMLSchema-instance"
	xsi:schemaLocation="http://maven.apache.org/POM/4.0.0 https://maven.apache.org/xsd/maven-4.0.0.xsd">
	<modelVersion>4.0.0</modelVersion>
	<parent>
		<groupId>org.springframework.boot</groupId>
		<artifactId>spring-boot-starter-parent</artifactId>
		<version>4.0.1</version>
		<relativePath/> <!-- lookup parent from repository -->
	</parent>
	<groupId>com.timposulabs</groupId>
	<artifactId>01-belajar-springboot-security</artifactId>
	<version>0.0.1-SNAPSHOT</version>
	<name>01-belajar-springboot-security</name>
	<description>Demo project for Spring Boot</description>
	<url/>
	<licenses>
		<license/>
	</licenses>
	<developers>
		<developer/>
	</developers>
	<scm>
		<connection/>
		<developerConnection/>
		<tag/>
		<url/>
	</scm>
	<properties>
		<java.version>21</java.version>
	</properties>
	<dependencies>
		<dependency>
			<groupId>org.springframework.boot</groupId>
			<artifactId>spring-boot-starter-security</artifactId>
		</dependency>
		<dependency>
			<groupId>org.springframework.boot</groupId>
			<artifactId>spring-boot-starter-thymeleaf</artifactId>
		</dependency>
		<dependency>
			<groupId>org.springframework.boot</groupId>
			<artifactId>spring-boot-starter-webmvc</artifactId>
		</dependency>
		<dependency>
			<groupId>org.thymeleaf.extras</groupId>
			<artifactId>thymeleaf-extras-springsecurity6</artifactId>
		</dependency>

		<dependency>
			<groupId>org.springframework.boot</groupId>
			<artifactId>spring-boot-devtools</artifactId>
			<scope>runtime</scope>
			<optional>true</optional>
		</dependency>
		<dependency>
			<groupId>org.springframework.boot</groupId>
			<artifactId>spring-boot-starter-security-test</artifactId>
			<scope>test</scope>
		</dependency>
		<dependency>
			<groupId>org.springframework.boot</groupId>
			<artifactId>spring-boot-starter-thymeleaf-test</artifactId>
			<scope>test</scope>
		</dependency>
		<dependency>
			<groupId>org.springframework.boot</groupId>
			<artifactId>spring-boot-starter-webmvc-test</artifactId>
			<scope>test</scope>
		</dependency>
	</dependencies>

	<build>
		<plugins>
			<plugin>
				<groupId>org.springframework.boot</groupId>
				<artifactId>spring-boot-maven-plugin</artifactId>
			</plugin>
		</plugins>
	</build>

</project>
2️⃣ Import Project ke IDE
Import project ke IntelliJ IDEA / Eclipse / NetBeans / VS Code: Buka IDE Anda, lalu impor proyek yang baru diunduh sebagai proyek Maven atau Gradle yang sudah ada.
3️⃣ Buat Controller
- Buat class Java contoh
DemoControllerdisrc/main/java/... - Gunakan anotasi
@Controllerdan@GetMappinguntuk memetakan URL ke method:
import org.springframework.stereotype.Controller;
import org.springframework.web.bind.annotation.GetMapping;

@Controller
public class DemoController {

	@GetMapping("/")
	public String home() {
		return "home";
	}
}
4️⃣ Buat View
Buat file home.html di src/main/resources/templates/ (untuk Thymeleaf):
<!DOCTYPE html>
<html xmlns:th="http://www.thymeleaf.org">
	<head>
		<title>Belajar Spring CRUD Security</title>
		<meta charset="utf-8">
		<meta name="viewport" content="width=device-width, initial-scale=1">
	</head>
	<body>
		<h2>TimposuLabs Company</h2>
		<hr />
		Welcome to our company homepage.
	</body>
</html>
5️⃣ Jalankan Aplikasi
- Buka terminal di root project.
- Jalankan dengan perintah Maven:
mvn spring-boot:run. - Pada output console Spring akan menggenerate secara otomatis security password untuk digunakan pada saat login. Contoh di bawah ini passwordnya adalah
f439ebb2-6ff6-4ab3-bd86-5df9982c126c.
Using generated security password: f439ebb2-6ff6-4ab3-bd86-5df9982c126c

This generated password is for development use only. Your security configuration must be updated before running your application in production.
- Buka browser dan akses http://localhost:8080/. Secara otomatis spring akan mengarahkan ke halaman autentikasi masukan username: user dan password sesuai dengan hasil generate security password sebelumnya.
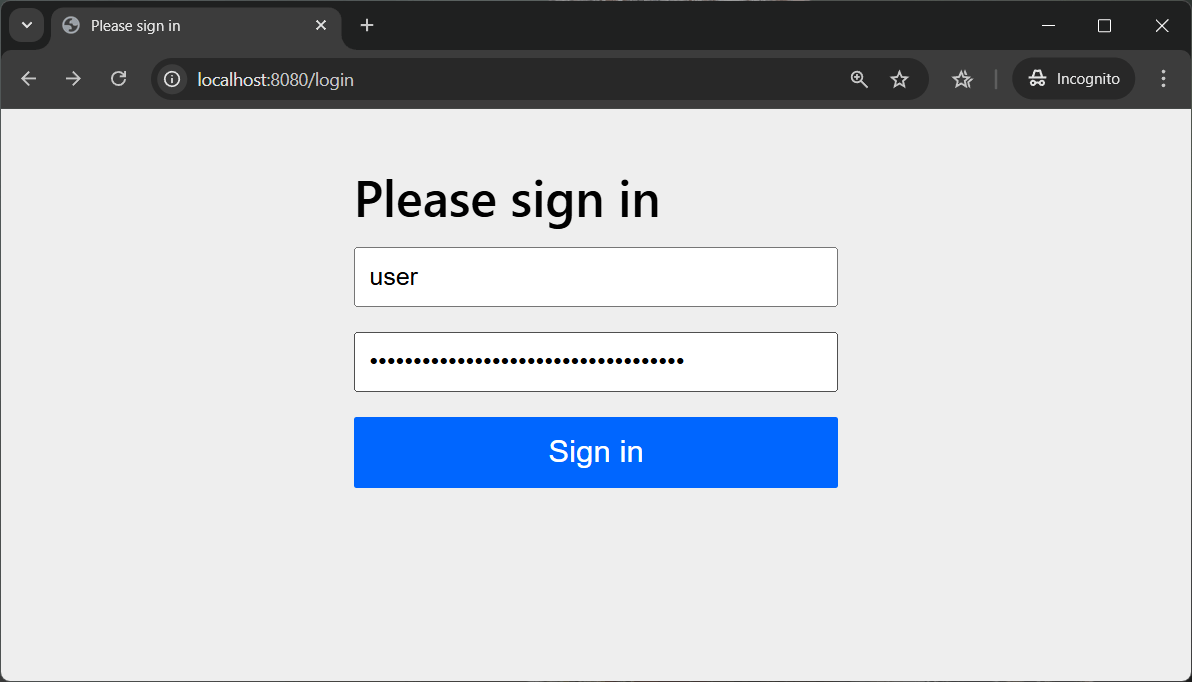
- Jika otentikasi sukses maka akan di arahkan ke halaman
home.
